The Asphalt Shingle Roof Installation Process Explained Step by Step
People searching for asphalt shingle roof installation often want to understand the process and find experienced local contractors who can handle the entire job smoothly.
Understanding the asphalt shingle roof installation process explained step by step can provide property owners with valuable insight into what to expect when considering a roof upgrade or replacement. This knowledge helps homeowners and property managers make informed decisions and ensures they are aware of the key stages involved in a successful installation. For those in the area exploring roofing options, knowing how local contractors approach each phase can build confidence in their expertise and professionalism, making it easier to choose the right service provider for the job.
Many property owners seek to learn about the asphalt shingle roof installation process to better coordinate their project planning or to understand the scope of work involved. Whether upgrading an aging roof or installing a new one on a new property, understanding these steps can clarify what is necessary for a durable, effective roof. Local service providers specializing in asphalt shingle installations are equipped to handle each part of the process, ensuring proper execution and quality results. Keep reading to discover how these professionals can help bring your roofing project to completion smoothly.
- Homeowners considering a new asphalt shingle roof often turn to local contractors who follow a detailed installation process to ensure durability and quality. - When replacing an aging or damaged roof, local service providers can guide clients through the asphalt shingle roof installation process explained step by step for optimal results. - Those planning to upgrade their roof for better protection may seek local pros familiar with the asphalt shingle roof installation process explained step by step to ensure proper application. - Property owners building a new home or adding an extension might work with local contractors who adhere to the asphalt shingle roof installation process explained step by step for a reliable roof system. - Individuals needing repairs after storm damage or leaks may contact local service providers experienced in the asphalt shingle roof installation process explained step by step to restore their roof effectively.
When homeowners search for information about the asphalt shingle roof installation process explained step by step, they are often seeking a clear understanding of what to expect during a roof replacement or new installation. This topic typically relates to plans for upgrading an aging roof, repairing storm damage, or installing a new roof on a recently purchased property. Property owners want to know how the work unfolds, from initial preparation to final inspection, so they can better coordinate with local contractors and ensure the project proceeds smoothly. Understanding this process helps homeowners feel more confident in their decisions and prepares them for the various stages involved in a major roofing project.
The asphalt shingle roof installation process is connected to a range of common problems and planning considerations. For example, homeowners may be dealing with leaks, mold, or structural concerns that necessitate a new roof. Others might be planning to improve the curb appeal of their property or increase its value through a roof upgrade. This process also involves choosing the right type of asphalt shingles, assessing the existing roof’s condition, and planning for proper ventilation and insulation. Local service providers specialize in guiding property owners through these decisions, ensuring that the installation aligns with the property's specific needs and addressing any underlying issues that could affect the longevity of the new roof.
The types of properties that typically come up in discussions about asphalt shingle roof installation include single-family homes, multi-family residences, and small commercial buildings. Residential properties are the most common, with homeowners often seeking a durable, cost-effective roofing solution that enhances their home's appearance. These projects can range from small, straightforward installations on modest homes to more complex jobs on larger properties with multiple stories or unique architectural features. Local contractors are experienced in handling various property types, ensuring that each installation is tailored to the building’s design, materials, and structural requirements, which helps achieve a durable, long-lasting roof.
Understanding the asphalt shingle roof installation process explained step by step helps property owners connect with local service providers who can handle each phase of the project. From removing the old roofing material and preparing the surface to installing the new shingles and performing final inspections, each step plays a vital role in ensuring a quality result. These professionals bring the expertise needed to manage challenges like weather delays, structural repairs, or custom roofing details. For homeowners planning a roof replacement or new installation, knowing how local contractors approach each phase can provide reassurance and clarity, making the entire process more transparent and manageable.
Roofing Material Replacement - this project involves selecting and installing various roofing materials, requiring similar planning and precision as asphalt shingle roof installation.
Attic Ventilation System Installation - proper ventilation is essential for roof longevity, involving similar skills in planning and working with roofing structures.
Roof Inspection and Assessment - assessing roof condition and identifying potential issues mirrors the detailed evaluation needed before shingle installation.
Roof Repair and Patching - fixing damaged areas on a roof shares techniques related to shingle replacement and surface preparation.
Flashing and Waterproofing Projects - installing flashing and waterproof barriers requires similar attention to detail as ensuring a proper shingle roof seal.
Gutter and Drainage System Installation - working on roof drainage systems involves understanding roofing structures and planning for effective water runoff management.
When evaluating local contractors for asphalt shingle roof installation services, it’s important to consider their experience with similar projects. Homeowners should inquire about how many asphalt shingle roof installations they have completed and whether they have worked on roofs of comparable size and complexity. An experienced service provider will have a clear understanding of the installation process, which can help ensure the project proceeds smoothly and meets expectations. Reputable contractors often provide references or examples of past work, giving homeowners an opportunity to assess the quality of their previous projects and determine if their style and standards align with what is desired.
Clear written expectations are essential when comparing local pros for asphalt shingle roof installation. Homeowners should seek detailed descriptions of the installation process, including the materials used, the steps involved, and the timeline for completion. A professional service provider will be transparent about what the project entails, helping to prevent misunderstandings or surprises along the way. It’s also helpful to review any written estimates or proposals carefully, ensuring they specify the scope of work and the responsibilities of each party. This clarity can foster a smoother working relationship and provide peace of mind that all aspects of the project are understood upfront.
Good communication and reputable references are key factors to consider when choosing local contractors. Service providers who are responsive to questions and provide thorough explanations demonstrate professionalism and a commitment to customer satisfaction. Additionally, checking references or reviews from previous clients can offer insights into their reliability, workmanship, and ability to handle projects similar to the asphalt shingle roof installation process explained step by step. Homeowners should prioritize contractors who are transparent, communicative, and well-regarded by past clients, as these qualities often contribute to a more positive experience and a successful roofing project.
Property owners often search for the asphalt shingle roof installation process explained step by step when they are planning practical projects around their homes and businesses. Local pros provide Asphalt Shingle Roof Installation services for everyday jobs and straightforward project options.

The asphalt shingle roof installation process explained step by step is a common topic for property owners who are considering replacing an aging or damaged roof. Homeowners in the area often look up this information to better understand what to expect during a roof replacement or new installation. Knowing the general steps involved can help them feel more prepared and confident when discussing project details with local contractors. Many property owners seek out local service providers who can handle each phase of the installation, from removing the old roofing material to installing new asphalt shingles that enhance the home's curb appeal and protect the structure.
Understanding the typical sequence of asphalt shingle roof installation can also help property owners identify what services they might need from local contractors. For example, some may want to know about the importance of proper surface preparation or how the shingles are layered for durability. By learning about this process, they can better evaluate which local providers are experienced in delivering quality results. Whether replacing an existing roof or installing a new one, property owners often turn to local pros who can guide them through each step and ensure the project is completed efficiently and effectively.
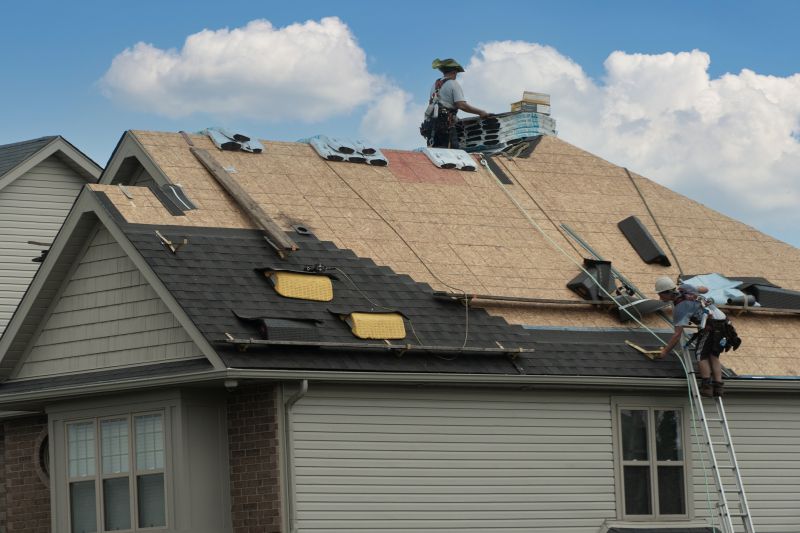
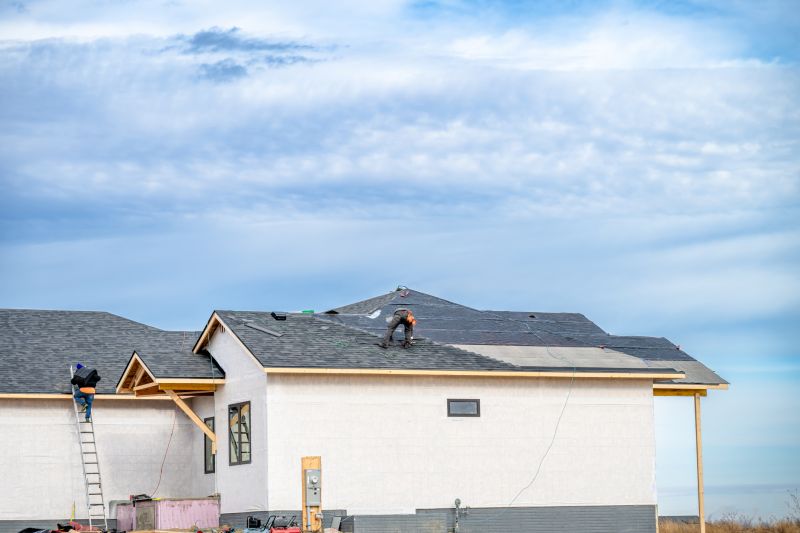
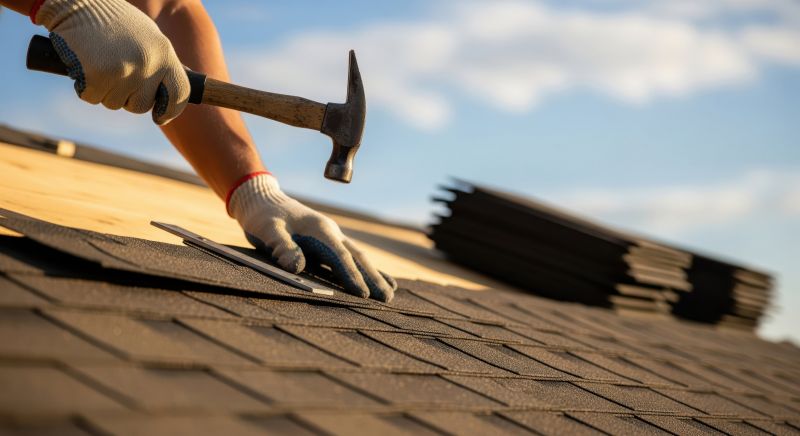
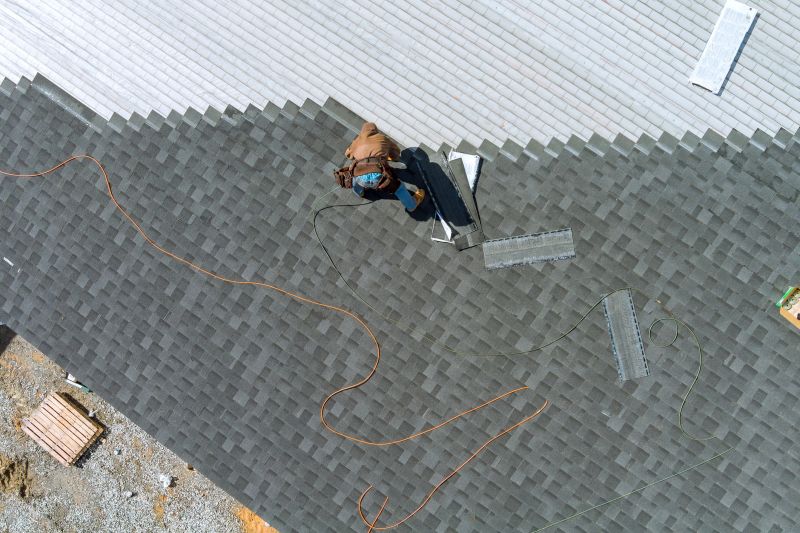
What are the main steps involved in the asphalt shingle roof installation process explained step by step? The process typically includes removing the old roofing, inspecting the roof deck, installing underlayment, laying down the asphalt shingles, and finishing with sealing and flashing. Local contractors follow these steps to ensure a proper and durable roof installation.
Why is proper preparation important in the asphalt shingle roof installation process? Proper preparation, such as inspecting and repairing the roof deck, helps prevent future issues like leaks or shingle damage. Skilled service providers ensure each step is done correctly to promote the longevity of the new roof.
How do local service providers handle the installation of asphalt shingles during the process? Local pros typically start by installing underlayment and flashing, then carefully lay asphalt shingles in overlapping layers, ensuring proper alignment and fastening for weather resistance and durability.
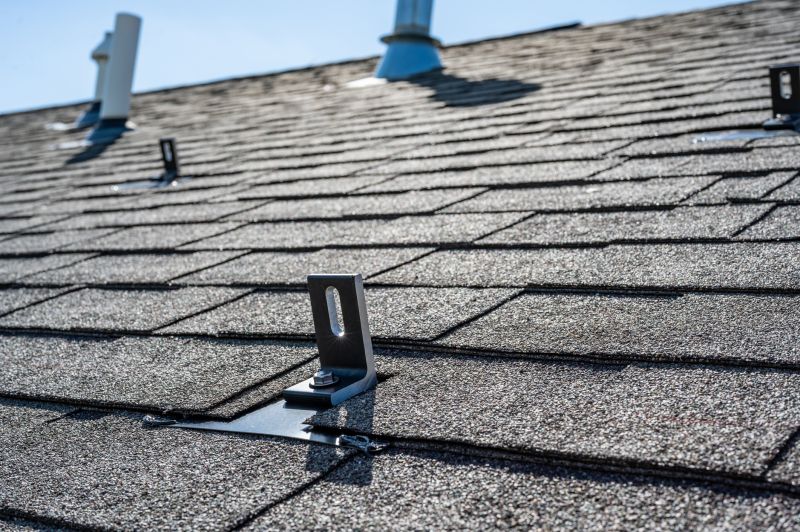
What role does ventilation play in the asphalt shingle roof installation process? Proper ventilation is essential to prevent heat and moisture buildup, which can damage the shingles and roof structure. Many local contractors incorporate ventilation solutions during installation to improve roof performance.
What are common finishing steps after installing asphalt shingles? Finishing steps often include sealing the edges, installing ridge caps, and inspecting the entire roof for quality. Local service providers ensure these details are completed to uphold the roof's integrity and appearance.
Understanding roof preparation - property owners can plan for necessary repairs or inspections before the asphalt shingle roof installation process begins, ensuring a smooth project.
Selecting the right shingles - homeowners can work with local contractors to choose asphalt shingles that match their style and durability needs for their property.
Scheduling installation steps - property owners can coordinate with local pros to ensure proper timing for each phase of the asphalt shingle roof installation process.
Post-installation inspection - property owners can arrange for a final review with local contractors to confirm the quality and completeness of the asphalt shingle roof installation.
If you are thinking about the asphalt shingle roof installation process explained step by step for a property, this guide is meant to help you understand this topic, the typical project types, and how different options might fit your plans.
When you are ready, you can use the quote form on this page to share a few details about your project. From there, local pros can review the basics and follow up with options that match what you have in mind.